- Industrial zone, South of Anping Town, Hengshui, Hebei, China.
- sales@hfpetromesh.com
- +86-18931809706
 Afrikaans
  Albanian
  Amharic
  Arabic
  Armenian
  Azerbaijani
  Basque
  Belarusian
  Bengali
  Bosnian
  Bulgarian
  Catalan
  Cebuano
  Corsican
  Croatian
  Czech
Czech  Danish
  Dutch
Dutch  English
  Esperanto
  Estonian
  Finnish
  French
  Frisian
  Galician
  Georgian
  German
  Greek
Greek  Gujarati
  Haitian Creole
  hausa
hausa  hawaiian
  Hebrew
  Hindi
Hindi  Miao
Miao  Hungarian
  Icelandic
  igbo
igbo  Indonesian
  irish
irish  Italian
  Japanese
  Javanese
  Kannada
  kazakh
  Khmer
Khmer  Rwandese
  Korean
  Kurdish
  Kyrgyz
  Lao
Lao  Latin
Latin  Latvian
  Lithuanian
  Luxembourgish
  Macedonian
  Malgashi
  Malay
Malay  Malayalam
  Maltese
  Maori
Maori  Marathi
  Mongolian
  Myanmar
  Nepali
  Norwegian
  Norwegian
  Occitan
  Pashto
  Persian
  Polish
  Portuguese
  Punjabi
  Romanian
  Russian
  Samoan
  Scottish Gaelic
  Serbian
  Sesotho
  Shona
Shona  Sindhi
  Sinhala
  Slovak
  Slovenian
  Somali
  Spanish
  Sundanese
  Swahili
  Swedish
  Tagalog
  Tajik
Tajik  Tamil
Tamil  Tatar
Tatar  Telugu
  Thai
Thai  Turkish
  Turkmen
  Ukrainian
  Urdu
Urdu  Uighur
  Uzbek
Uzbek  Vietnamese
  Welsh
Welsh  Bantu
Bantu  Yiddish
  Yoruba
  Zulu
Zulu
- Afrikaans
- Albanian
- Amharic
- Arabic
- Armenian
- Azerbaijani
- Basque
- Belarusian
- Bengali
- Bosnian
- Bulgarian
- Catalan
- Cebuano
- Corsican
- Croatian
- Czech
- Danish
- Dutch
- English
- Esperanto
- Estonian
- Finnish
- French
- Frisian
- Galician
- Georgian
- German
- Greek
- Gujarati
- Haitian Creole
- hausa
- hawaiian
- Hebrew
- Hindi
- Miao
- Hungarian
- Icelandic
- igbo
- Indonesian
- irish
- Italian
- Japanese
- Javanese
- Kannada
- kazakh
- Khmer
- Rwandese
- Korean
- Kurdish
- Kyrgyz
- Lao
- Latin
- Latvian
- Lithuanian
- Luxembourgish
- Macedonian
- Malgashi
- Malay
- Malayalam
- Maltese
- Maori
- Marathi
- Mongolian
- Myanmar
- Nepali
- Norwegian
- Norwegian
- Occitan
- Pashto
- Persian
- Polish
- Portuguese
- Punjabi
- Romanian
- Russian
- Samoan
- Scottish Gaelic
- Serbian
- Sesotho
- Shona
- Sindhi
- Sinhala
- Slovak
- Slovenian
- Somali
- Spanish
- Sundanese
- Swahili
- Swedish
- Tagalog
- Tajik
- Tamil
- Tatar
- Telugu
- Thai
- Turkish
- Turkmen
- Ukrainian
- Urdu
- Uighur
- Uzbek
- Vietnamese
- Welsh
- Bantu
- Yiddish
- Yoruba
- Zulu
Channel Drain Grate Replacement - Professional Services & Quality Solutions
Channel Drain Grate Replacement A Comprehensive Guide
Channel drains are essential components of effective surface water management systems, designed to direct water away from driveways, patios, and other paved areas. Over time, these drains can become clogged or damaged, necessitating a replacement of the channel drain grates. This guide will walk you through the process of channel drain grate replacement, ensuring a seamless continuation of your drainage system's function.
Understanding Channel Drain Grates
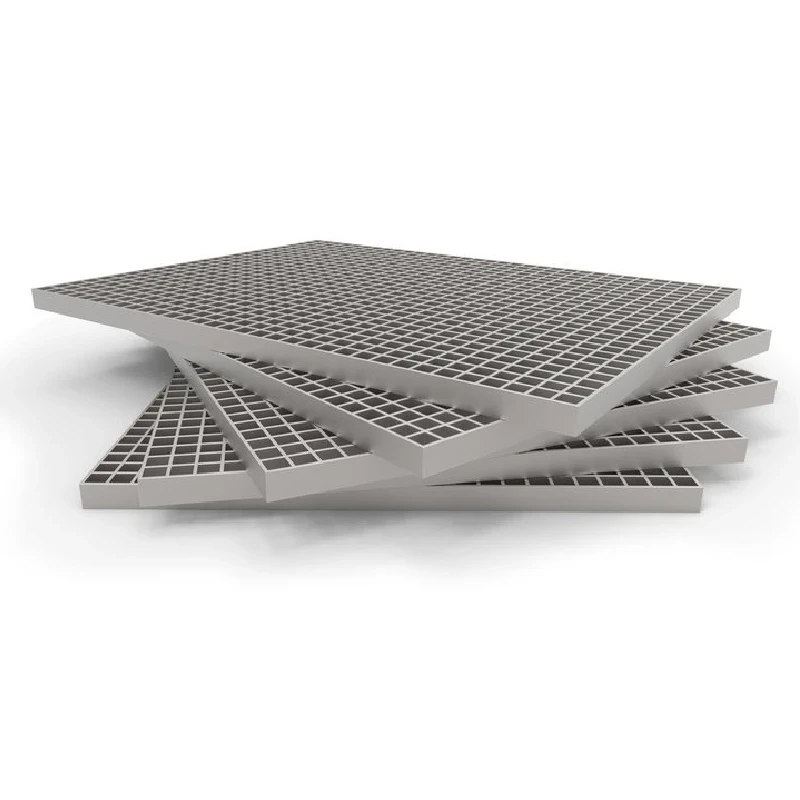
Channel drain grates are the covers placed over the drainage channels. They serve multiple purposes preventing large debris from entering the drain, providing a safe walking surface, and maintaining an aesthetic appearance. These grates come in various materials, including plastic, metal, and concrete, each suited for different applications and loads.
Signs You Need to Replace Your Grate
Several indicators suggest that it’s time for a replacement 1. Cracking or Damage Visible cracks or broken pieces can impede drainage and pose safety hazards. 2. Clogs and Backups Frequent clogs or water pooling around the drain can indicate that the grate is ineffective or damaged. 3. Rust or Corrosion For metal grates, rust can weaken the structure and reduce its lifespan. 4. Improper Fit Grates that do not fit snugly in the channel may allow debris to enter, leading to clogs.
Steps for Replacement
channel drain grate replacement

1. Assess the Situation Before replacing the grate, inspect the channel drain for any signs of damage or blockage. Address any underlying issues to avoid future replacements. 2. Choose the Right Replacement Grate Select a grate that fits your existing channel drain. Consider materials and load ratings based on the intended use.
3. Remove the Old Grate Carefully lift the damaged grate from the channel. Depending on the installation, this may require the use of tools.
4. Clean the Channel Before installing the new grate, clear out any debris or buildup from the channel to ensure proper drainage.
5. Install the New Grate Position the new grate securely within the channel. Make sure it fits snugly and is level with the surrounding surface.
6. Test the Drainage After installation, run water through the channel to ensure everything is functioning correctly and there are no leaks.
Conclusion
Replacing a channel drain grate may seem daunting, but with proper knowledge and preparation, it can be accomplished efficiently. By ensuring that your channel drains remains in top condition, you safeguard your property against water damage and maintain a safe environment for users. Regular inspections and timely replacements can enhance the longevity and effectiveness of your drainage system.
-
Welded Steel Bar Grating: The Rugged Industrial Flooring Solution Built for Load and LongevityNewsJun.24,2025
-
Steel Walkway Grating: Reliable, Resilient, and Built for Every StepNewsJun.24,2025
-
Shale Shaker Screen for Sale: Optimize Drilling Efficiency with Precision Screening PowerNewsJun.24,2025
-
Shaker Screen for Sale: Elevate Your Drilling Efficiency with Durable Separation SolutionsNewsJun.24,2025
-
Press Locked Steel Grating: Industrial Strength with Precision Fit for Heavy-Duty ApplicationsNewsJun.24,2025
-
Perimeter Safety Netting: The Critical Safety Upgrade for Every HelipadNewsJun.24,2025